Inventory Codes
If you use inventory items in your invoices, you can select inventory codes (that you have already created in Xero) to save you typing out all the details in each invoice.
How do you do that?
To create inventory codes:
-
Navigate to the Accounts tab along the top of the screen and select “Inventory”.
- Click on the New Item button. You will now be prompted to fill in the details of the inventory item as shown below.
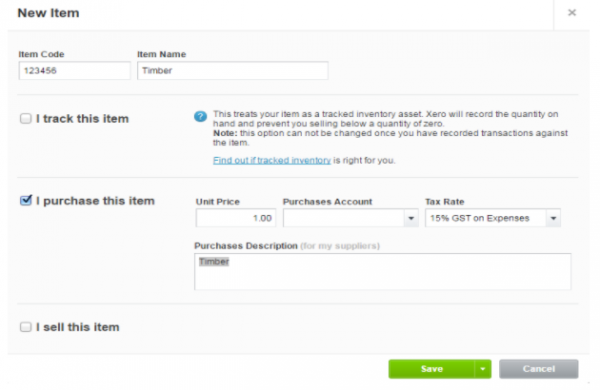
3. Click “Save”.
Now you are ready to use these codes in your invoices, all details automatically populating your invoice when you select the inventory code!
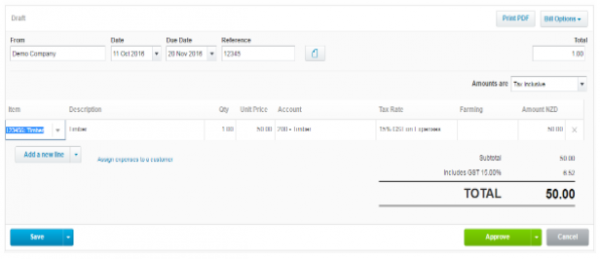
To do this, when you create your next invoice with an inventory item, click on the item box on the left of the new bill or invoice screen and select the relevant inventory code as shown below. You can also create more inventory codes from this item box if you realise you need a new one for your current bill or invoice.
For an overview of how Xero’s inventory works in practice, watch the video on the following page.
If you would like to know more, please contact your WK Advisor.